Setup
Getting started
Section titled “Getting started”The very first time you launch the app, it asks how your catalog should be organized:
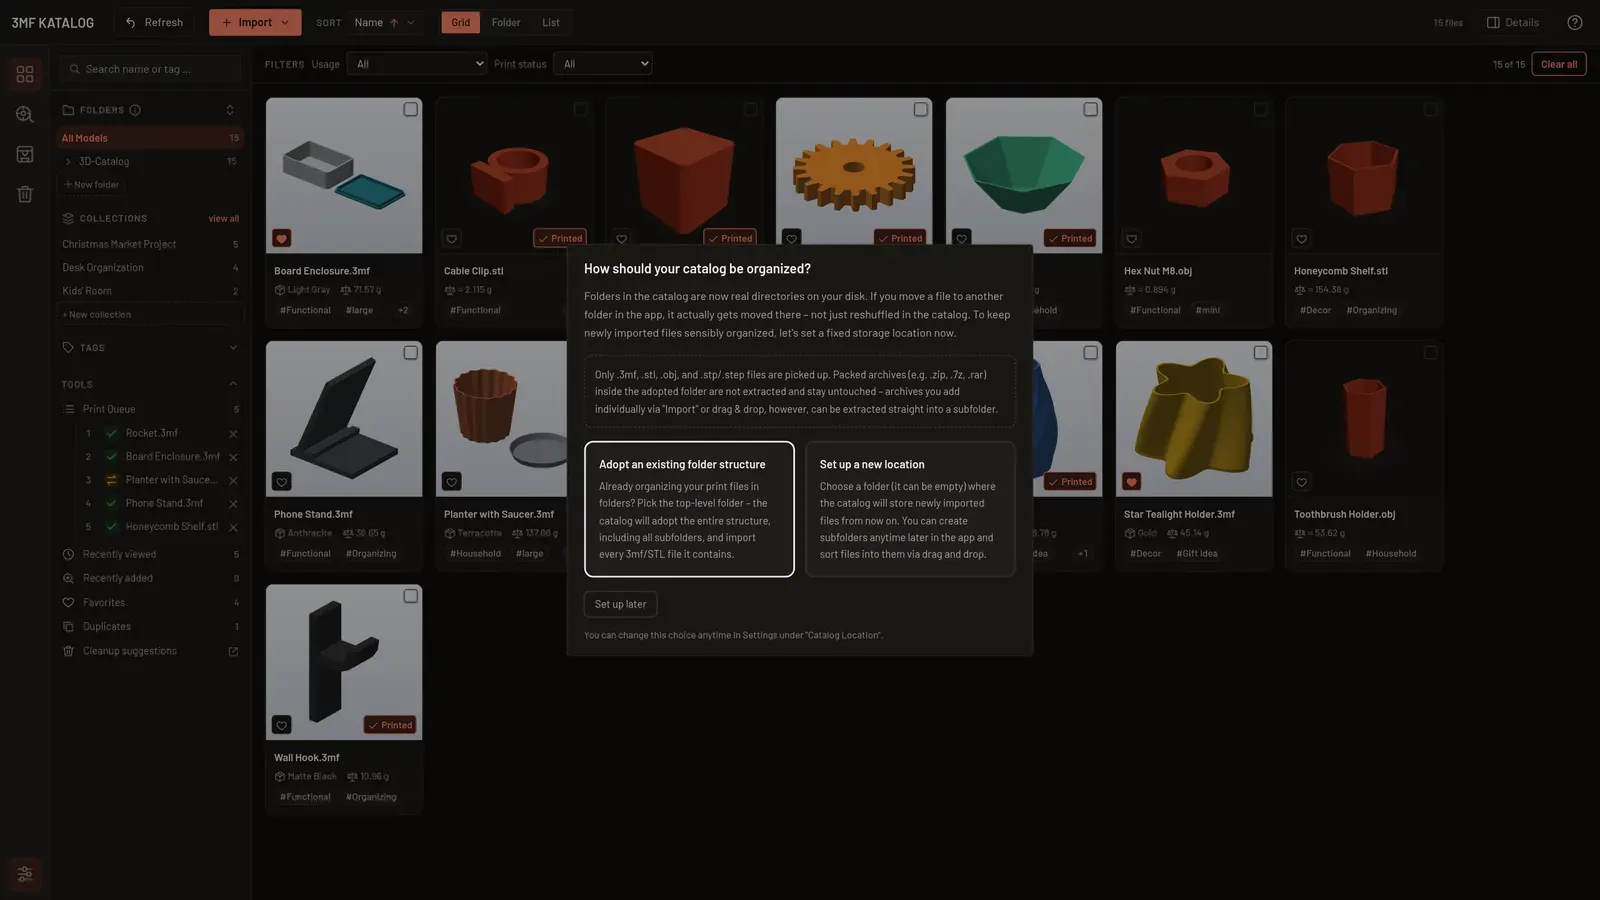
Folders in the catalog correspond to real directories on your hard drive — if you move a file to another folder inside the app, it’s actually moved there, not just re-sorted within the catalog. You have two options:
- Adopt an existing folder structure — if you already organize your print files in folders,
choose the top-level folder. The catalog adopts the complete structure including
subfolders and automatically imports every
.3mf/.stl/.obj/.stp/.stepfile it contains. - Set up a new location — a folder where the catalog will store newly imported files from
now on. Under “Where should the catalog folder go?” your Documents folder is suggested; “Choose
place …” picks another one. Under “Name of the new folder” you type the name (suggested: “3D
Catalog”). The line below shows the full path before anything happens; “Create folder and set
up” creates the folder and uses it. If a folder with that name already exists there, the app
says so and uses it as it is; if there is a file or a link (shortcut) with that name instead, you
have to choose another name. Names with characters that aren’t allowed in folder names
(
/ \ : * ? " < > |) are rejected with a hint. If you’d rather use a folder you already have, click “pick an existing folder directly”.
You can change this choice at any time in Settings under “Catalog Location”. The dialog can also be skipped with the “Set up later” button; you can choose the location afterwards.
Already-packed archives (e.g. .zip) are not picked up by the automatic scan and are left
untouched — unpack them first if needed, or open the folder directly from the catalog via your
file manager afterwards.
First import
Section titled “First import”- Click Import and select files or a folder, or drag files into the window.
- Wait for metadata and suggested tags to be read.
- Double-click a model to open it.