
Organize your catalog
Interface overview
Section titled “Interface overview”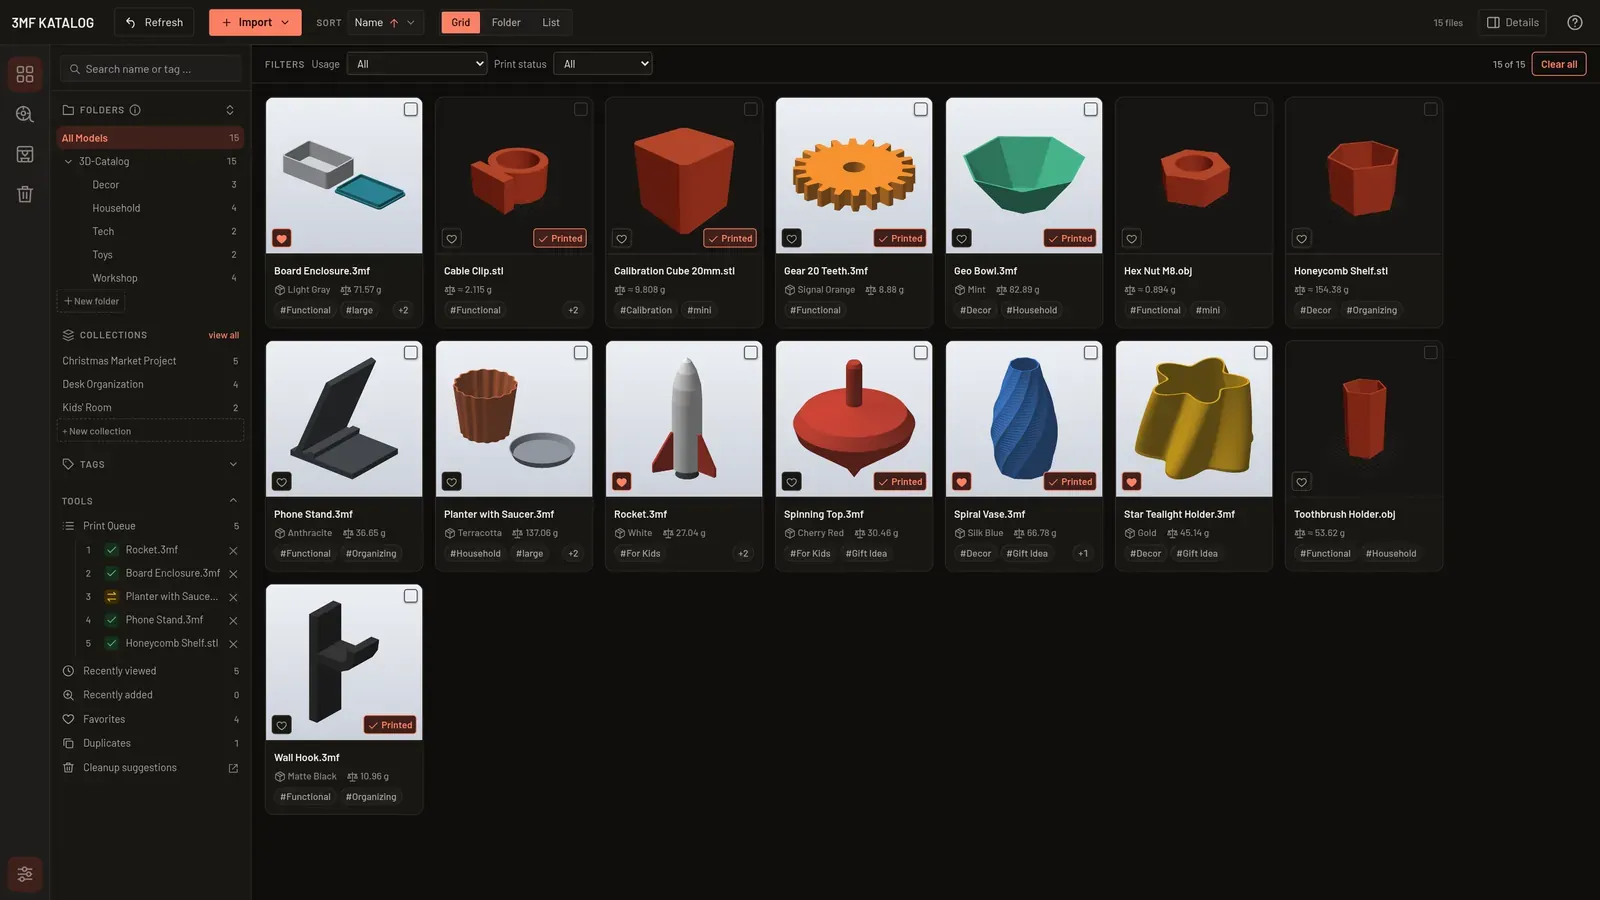
- Far left, the narrow navigation rail: switches between “Catalog”, “Material Manager”, “Printer Manager” and “Trash” (with an item-count badge). The gear icon for Settings sits at the very bottom.
- Sidebar: a search field, followed by your folder tree with a model count per folder, your collections, your tags, and your print queue.
- Main area: your catalog as a grid (tiles with a preview image) or a list, switchable, plus sorting and the “Import” button top left.
- Detail panel on the right: shows the preview and metadata of the currently selected model, including quick actions like “Printed”/“Add to queue”.
Browsing and organizing your catalog
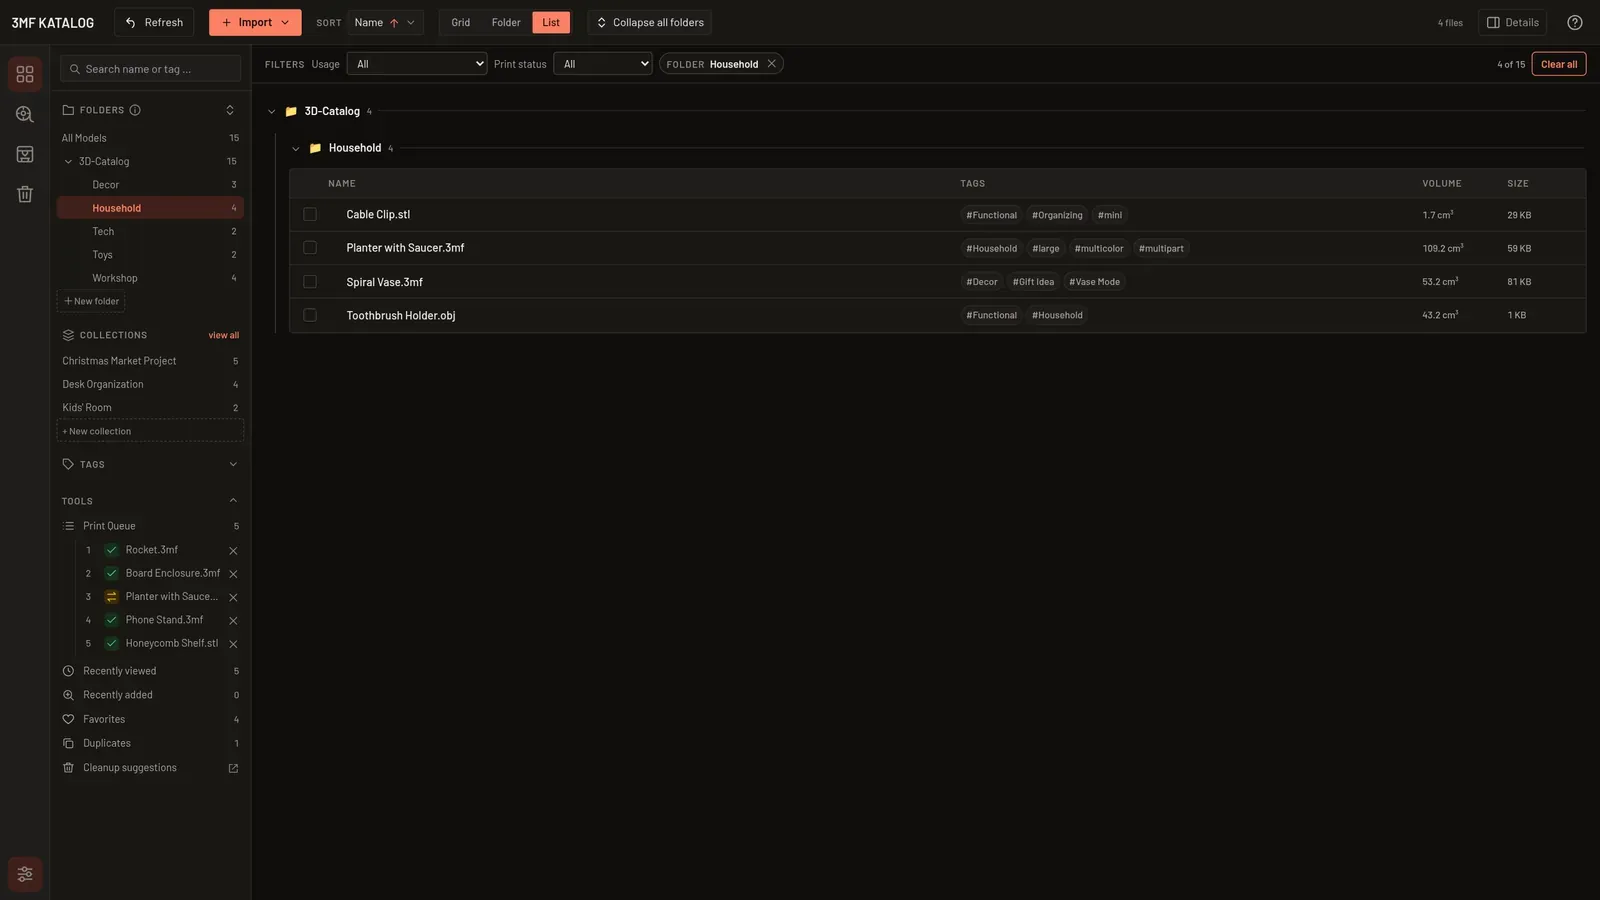
Section titled “Browsing and organizing your catalog”Top right, next to “Import”, you switch between three views: grid (image tiles), folder, and list:
The list shows additional columns (tags, volume, file size) and can be sorted by clicking a column header.
Creating new folders
Section titled “Creating new folders”Below the folder tree, + New folder creates a folder. It is created below the currently selected folder, at the top level for “All models”. Type the name and confirm with Enter; Escape cancels. Folders are real directories on disk, so the same file system rules apply on every system:
- the characters
/ \ : * ? " < > |and control characters are not allowed, - the name must not end in a dot or a space and must not be
.or.., - reserved Windows names such as
CON,PRN,AUX,NUL,COM1toCOM9andLPT1toLPT9are not allowed (also with an extension, for exampleCON.txt), - the name may be at most 255 bytes long.
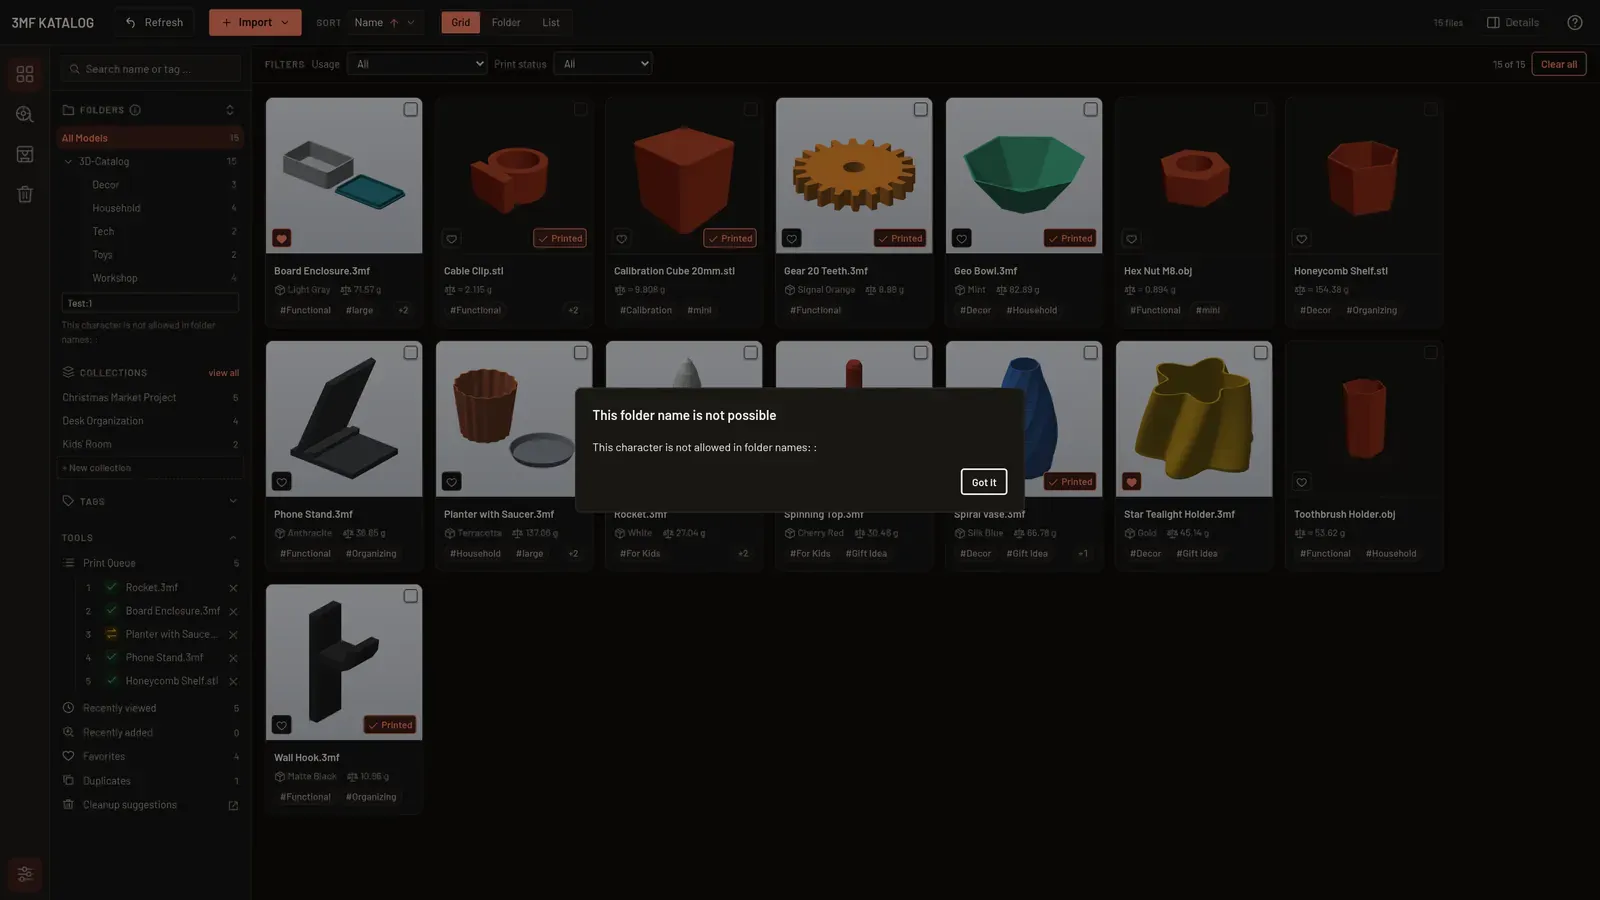
If a name does not fit, a hint appears below the field while you type. If you press Enter, a dialog opens in the middle of the window and explains the problem. Close it with “Got it” or Enter; the cursor is back in the field and no folder is created.
Renaming and deleting folders
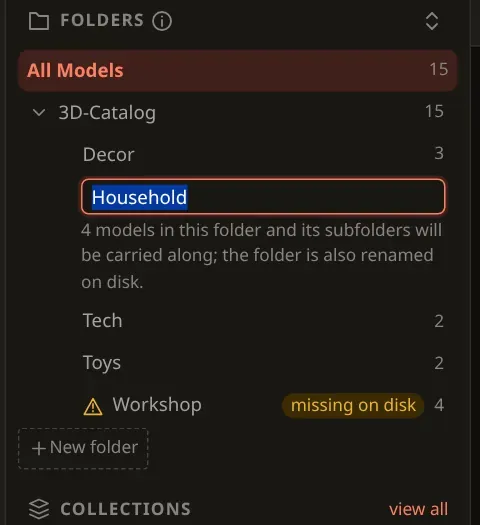
Section titled “Renaming and deleting folders”Rename: Right-click a folder in the folder tree and choose “Rename”, or focus the folder and
press F2. The name is edited right in the tree: Enter confirms, Escape cancels. The folder is
also renamed on disk, and its models (including those in subfolders) are carried along. The name
must not contain “/” or “\” and must not be empty. If renaming fails, the error message appears
below the field and you can correct the name. Files whose catalog entry is not assigned to this
folder are carried along as well, as are trash entries below it. If the new path is already
taken by another entry, the rename is aborted and nothing changes. A notice reports the result
and offers “Undo” (see Undo).
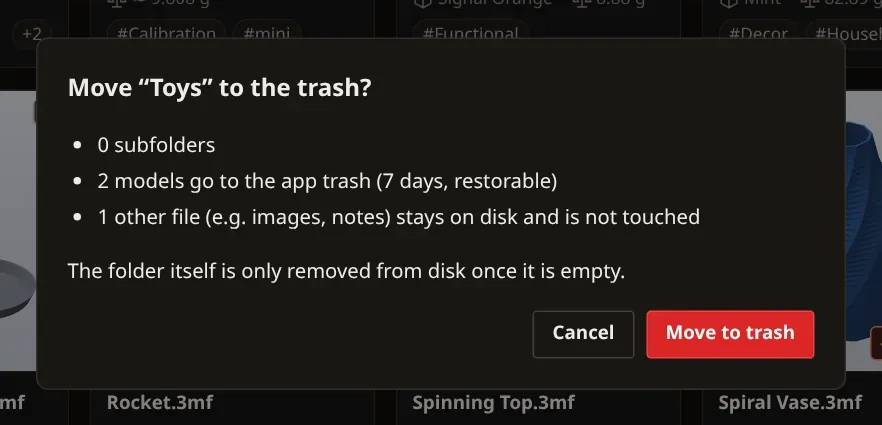
Delete: In a folder’s context menu, “Move to trash …” puts its models into the app trash. The dialog first states how many subfolders and models are affected. The models stay restorable for 7 days (Trash); when restored, their folder is recreated if it no longer exists. Other files in the folder (for example images or notes) are not touched, and a folder containing such files stays on disk; the folder itself is only removed once it is empty. The catalog location and the folders above it cannot be moved to the trash. If you only want to remove the catalog entry and leave everything on disk, choose “Remove from catalog” instead (Context menu, multi-select and removal).
Missing folders: If a folder no longer exists on disk, the folder tree marks it with a warning symbol and the label “missing on disk”. The disk sync lists such folders.
Folder view
Section titled “Folder view”The Folder view groups your models by their real folder structure on disk — like a file explorer, with subfolders indented and a continuous connecting line:
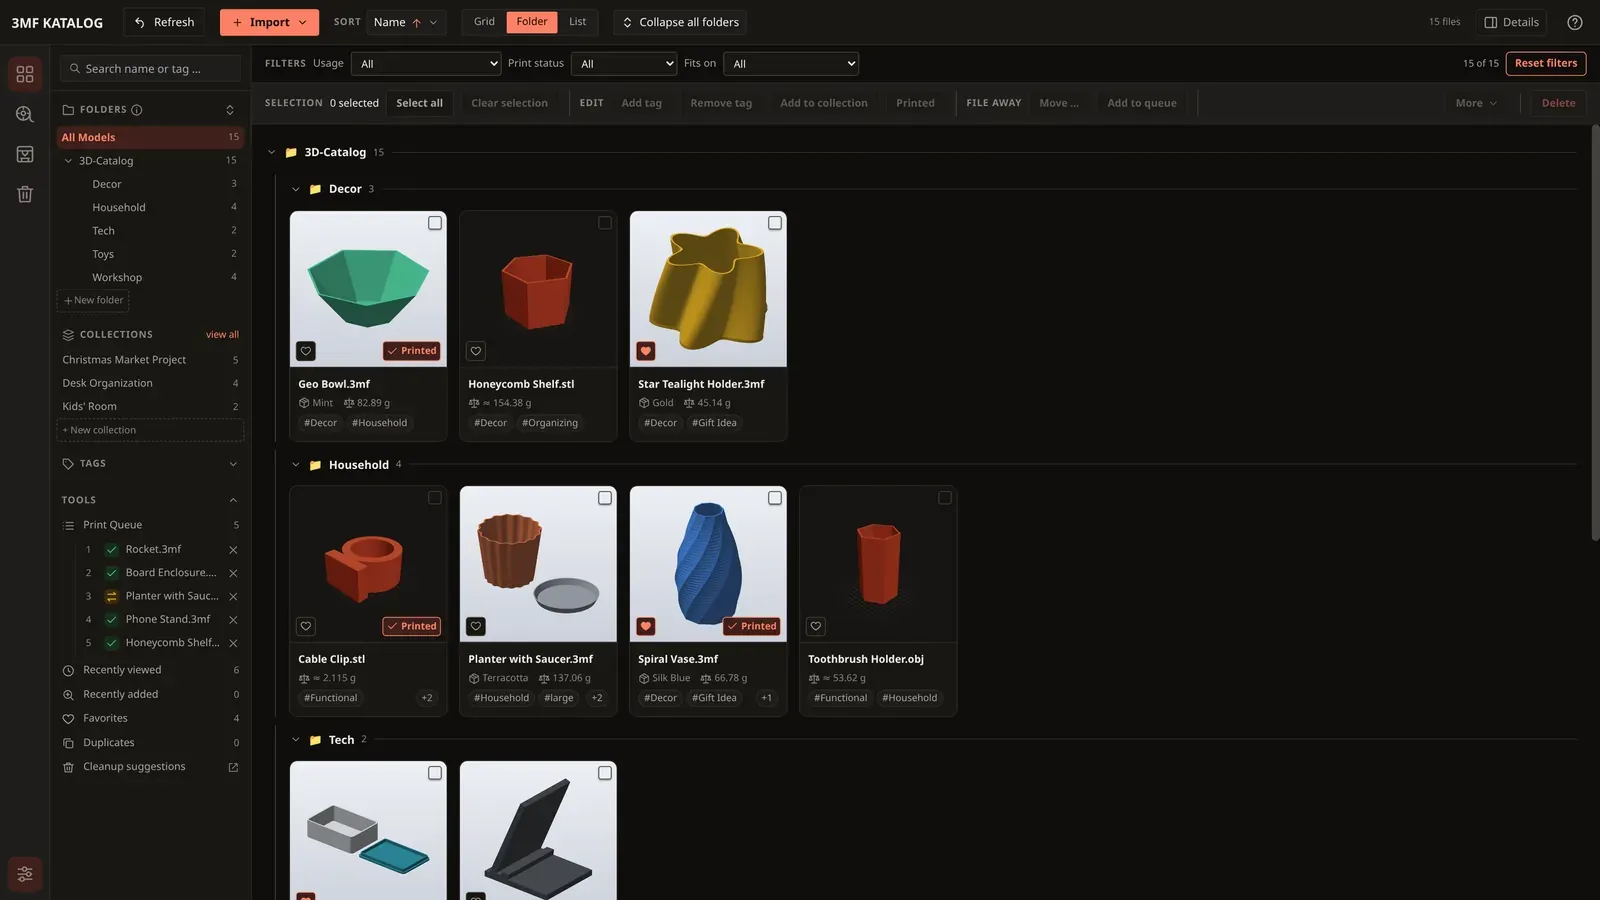
Each folder header shows the total number of files it contains, including all subfolders. Clicking a header collapses or expands that folder — the state persists across app restarts. Files with no folder appear as a final “No Folder” section. Both folder headers and individual files can be dragged directly within this view, exactly like in the sidebar — moving something here also moves it on disk immediately.
The same grouping is available in list form.
Three independent mechanisms are available for organizing your catalog overall, and you can combine them freely:
- Folders (sidebar, left) — real directories on disk, see above.
- Tags — freely assigned hashtags, collected under “Tags” in the sidebar, clickable to filter.
- Collections — explicitly group several models into a project (see Collections).
The search field at the top of the sidebar filters by name, tag, creator or file path.
A match in any of these fields is enough. Press / to focus search when single-key shortcuts
are enabled and you are not typing in an input field.
Filters, sorting and tags
Section titled “Filters, sorting and tags”The filter bar above the models shows active folders, tags, collection, search and view, plus the chosen usage and print status. Remove individual filters with their cross button. “Reset filters” resets the filters without deleting models. The count shows how many catalog models match.
The same bar has two drop-downs: Usage (“All”, “Commercial use allowed”, “Private use only”, “Not specified”, based on the model’s license) and Print status (“All”, “Printed”, “Not yet printed”). Both combine with each other and with folder, tag, search and the other filters. An active choice also appears as a chip that you can remove.
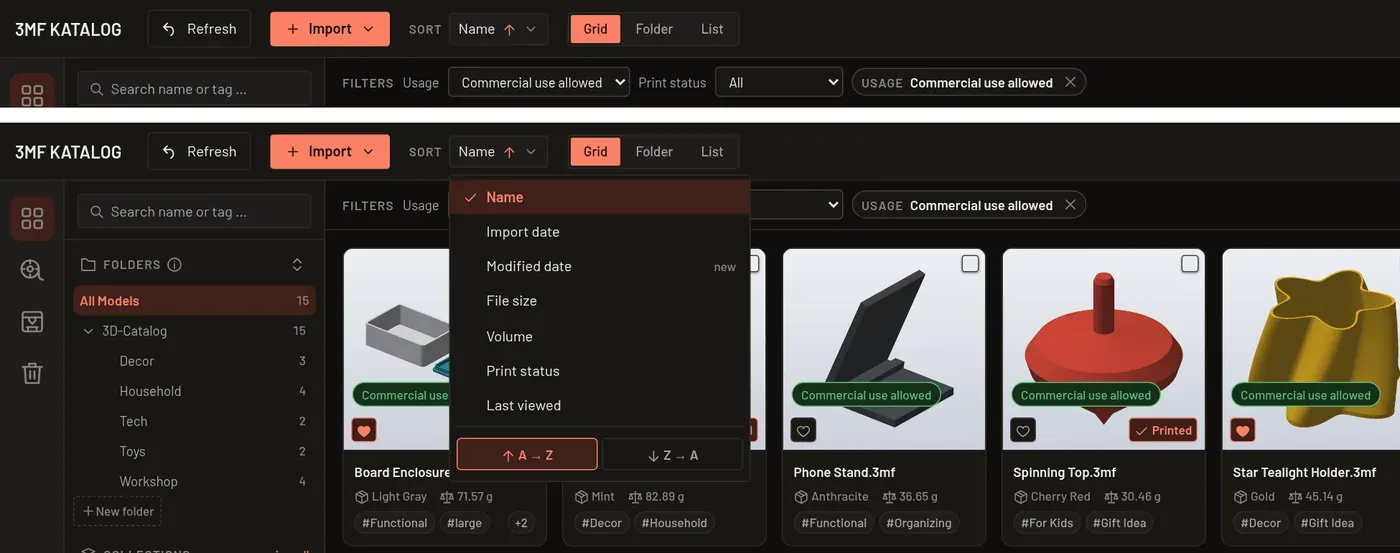
Under “Sort”, choose “Name”, “Import date”, “Modified date”, “File size”, “Volume”, “Print status” or “Last viewed”. Each supports both directions: for example “A → Z” and “Z → A” for names, “Oldest first” and “Newest first” for dates, and “Not yet printed first” or “Printed first” for print status. Within each print-status group, models are ordered by name.
Use “Filter tags …” to search the tag list in the sidebar. Below the list you can also reveal tags with only one model. When adding a tag in the selection bar or details, the app suggests existing tags.
Automatic tags
Section titled “Automatic tags”On import, during disk sync and for source folders, the app assigns some tags itself (for example “lid”, “vase” or “gear”). They appear in the app language; the German name is still what is stored. Names you type by hand in other languages, such as “Deckel” or “couvercle”, are merged with “lid”.
- Turning it off: Under “Settings” → “Catalog”, turn off “Assign tags automatically” (on by default). Import, sync and source folders then no longer assign tags. Existing tags stay, and you can still add tags by hand.
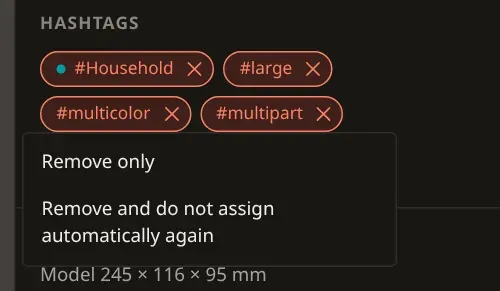
- Blocking a tag for good: For a tag the app would assign to the model itself, the ✕ in the
detail panel and on the detail page opens a small menu: “Remove only” removes the tag from this
model only, and other models can still get it automatically. “Remove and do not assign
automatically again” blocks it: it is no longer assigned automatically on new imports and
during sync, in all languages and regardless of upper or lower case. You can still add it by
hand. The notice afterwards offers “Undo”.
- Lifting a block: “Settings” → “Catalog” lists all blocks under “Blocked automatic tags”. “Lift block” ends a block. The list still applies if you turn “Assign tags automatically” off and on again.
Sidebar and model cards
Section titled “Sidebar and model cards”Drag the sidebar edge to adjust its width. “Collapse all folders” collapses the folder tree. Folders, collections and tags have their own icons.
Model cards share one height per density setting. Tags occupy one line; additional tags collapse into a “+n” chip. Drag a card by its handle to see a preview and highlighted targets. Hover over a folder to open it. Dropping into a folder moves the file on disk; dropping onto a collection adds it to that collection. If several cards are selected, dragging one of the selected cards moves all of them; more under Moving models.
For screen readers the model list is a grid with multi-selection: cards and list rows are announced with their name and selection state, and the selection bar announces the number of selected models.
Detail panel and keyboard
Section titled “Detail panel and keyboard”The right-hand detail panel opens when you click a model. Under “Settings” → “General” → “Detail panel”, choose “Automatic (appears when clicked)” or “Always visible”. Depending on the available data, status badges show printed/not printed, material, filament check, favorite, queue and last printer.
Ctrl/Cmd+A selects all models in the filtered view. Arrow keys change the selected model, M
moves the selection to a folder, and Ctrl/Cmd+Z undoes the last move or rename.
All keyboard shortcuts and disabling single-key shortcuts.