
Printer Manager
Selecting and adding printers
Section titled “Selecting and adding printers”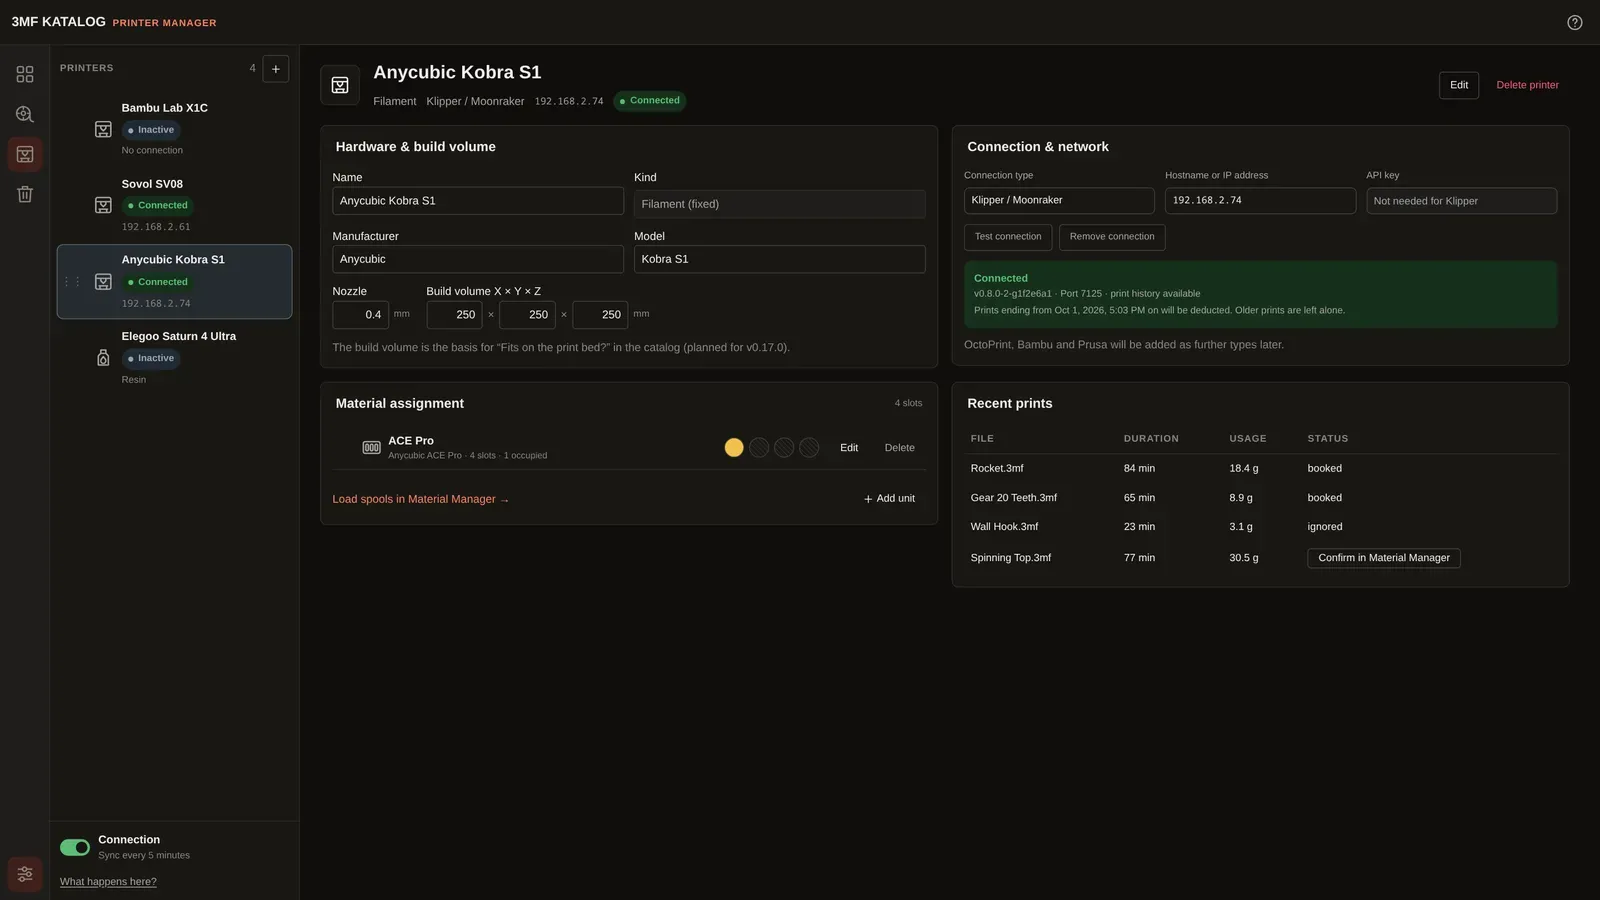
Open “Printer Manager” in the left navigation rail. The printer list is on the left; the selected printer’s details are on the right. In narrow windows you can expand or collapse the list. Drag a printer’s handle to change its position in the list.
Use the plus button labelled “+ Add printer”, enter a name and choose “Filament” or “Resin”. The kind cannot be changed afterwards. A filament printer gets a “Spool holder” with one slot; a resin printer gets a “Resin vat” for one bottle.
Hardware & build volume
Section titled “Hardware & build volume”“Edit” opens the inputs for “Name”, “Manufacturer”, “Model” and “Build volume X × Y × Z”. Filament printers also have “Nozzle”. “Save” applies your changes; “Cancel” discards them.
Numeric fields are optional. If filled in, the nozzle must be between 0.1 and 2.0 mm and each build-volume axis between 1 and 2000 mm. You can use a decimal comma or point. Invalid values get a message next to the field, and focus moves to the first invalid field. The recorded build volume is used for the “Print bed” check in the model details and the “Fits on” filter in the catalog (Does it fit the print bed?). Printers without a complete build volume are left out there.
Connection & network
Section titled “Connection & network”For filament printers, set up “Klipper / Moonraker” here and check the address with “Test connection”. The global “Connection” switch is at the bottom of the printer list and is off by default. For resin printers, this area explains that no connection is available. Set up a printer connection.
Material assignment
Section titled “Material assignment”Manage units and slots here. “Add unit” offers templates for Bambu AMS, AMS lite, AMS HT, Creality CFS, Prusa MMU3, Anycubic ACE Pro and Spool holder, as well as “Custom …”. You can add several units of the same kind and reorder them by their handles.
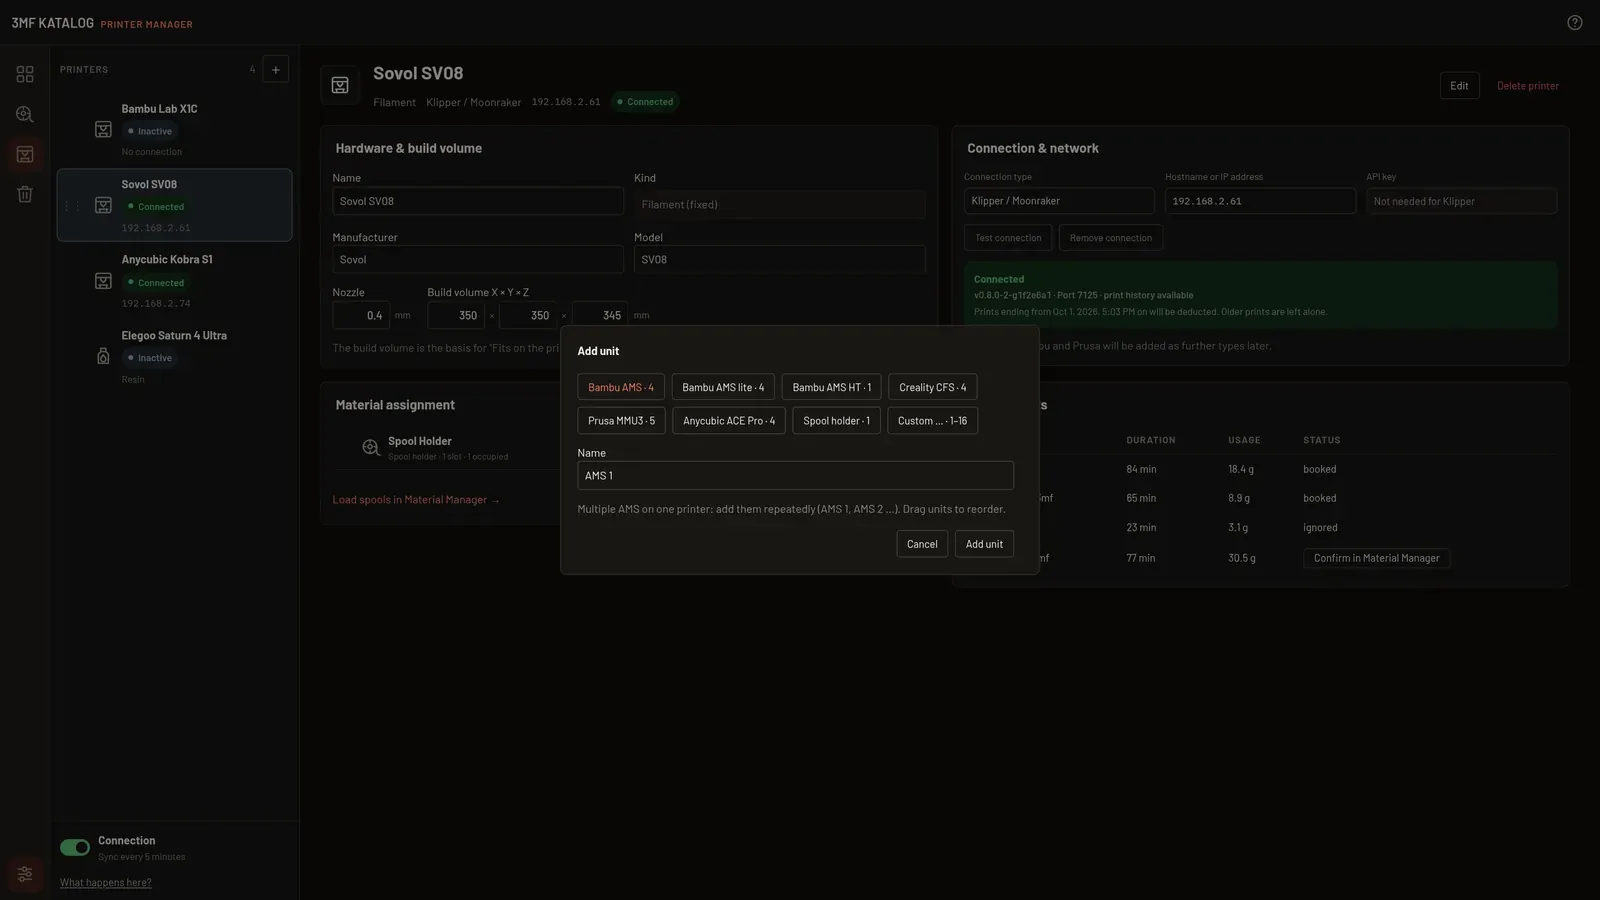
A resin vat remains the only unit and cannot be renamed or deleted.
Load spools and bottles in “Material Manager”. The “Load spools in Material Manager →” link takes you there. Assign spools and resin vats.
Recent prints
Section titled “Recent prints”When print history exists, “Recent prints” shows the file, duration, usage and status. “Confirm in Material Manager” opens pending prints. Usage is deducted only after you confirm it. Processed entries show “booked” or “ignored”.
“Delete printer” asks for confirmation. Loaded material returns to its home location.